Turnips are a hardy and versatile root vegetable that can be grown in a variety of climates, making them ideal for both novice and experienced gardeners. Known for their peppery flavor, they can be eaten raw in salads, roasted, and used in various dishes. In this article, we will explore the secrets to rapidly grow turnips, ensuring a quick harvest and success in your gardening endeavors.
1. Understanding Turnips
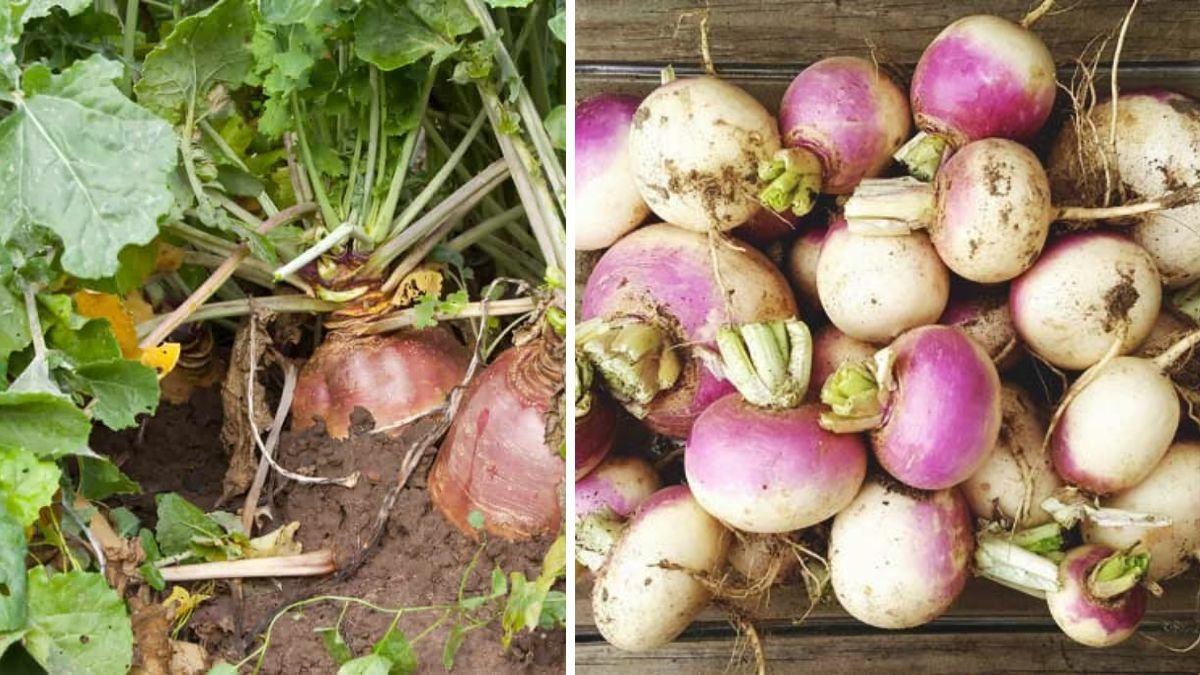
Turnips (Brassica rapa) belong to the Brassicaceae family, which also includes cabbage, broccoli, and kale. They are biennial plants typically grown as annuals, requiring a cool season to thrive. Turnips are primarily cultivated for their edible roots, but their greens are also nutritious and can be harvested.
Varieties of Turnips
There are several varieties of turnips, each with its unique characteristics:
- White Globe: A classic choice, known for its round shape and mild flavor.
- Purple Top: This variety has a purple crown and white flesh, offering a slightly sweeter taste.
- Golden Globe: Smaller and sweeter, these turnips can be a great addition to unique dishes.
- Hakurei: A Japanese variety, these turnips are mild-tasting and can be eaten raw.
Ideal Growing Conditions
Turnips thrive in cool temperatures between 50°F and 75°F (10°C – 24°C). They appreciate fertile, well-drained soil rich in organic matter.
2. Preparing the Soil
The foundation of rapid turnip growth starts with proper soil preparation.
Soil Type
- Loamy or Sandy Soil: Turnips prefer well-draining soil that allows for easy root development. Heavy clay soils should be amended with compost or sand.
- pH Level: Aim for a pH level between 6.0 and 7.5. Testing your soil can help determine if amendments are necessary.
Fertility
Enhance soil fertility by incorporating organic matter, such as compost or well-rotted manure. This not only improves soil texture but also provides vital nutrients.
3. Sowing Seeds
Timing and method of sowing seeds are crucial for quick growth.
When to Sow
- Spring: Sow seeds 2-4 weeks before the last frost date.
- Fall: In warmer climates, a fall planting can yield a second harvest before winter.
Seed Spacing
- Rows: Space seeds 1 inch apart in rows that are 12-18 inches apart.
- Thinning: After germination, thin seedlings to ensure they are spaced 4-6 inches apart for optimal growth.
Direct Seeding vs. Transplanting
While you can start seeds indoors and transplant them, direct sowing is often more successful for turnips, as they do not transplant well.
4. Watering
Proper watering is essential for quick growth, especially during the germination period.
Watering Schedule
- Frequency: Water your turnips deeply about once a week.
- Soil Moisture: Keep the soil consistently moist but not waterlogged. Use mulch to retain moisture and suppress weeds.
5. Pest and Disease Management
Maintaining healthy plants involves vigilance against pests and diseases that commonly affect turnips.
Common Pests
- Aphids: Small insects that can cause stunted growth. Use insecticidal soap or neem oil to manage them.
- Flea Beetles: These pests create small holes in leaves. Row covers can protect young plants.
Diseases
- Downy Mildew: This fungal disease can be prevented with good air circulation and proper spacing.
- Root Rot: Overwatering can lead to this disease. Ensure well-drained soil.
6. Fertilizing
Proper fertilization is key to rapid turnip growth.
Type of Fertilizer
Opt for a balanced fertilizer such as a 10-10-10 (N-P-K) or organic options like bone meal and kelp meal to provide essential nutrients without overwhelming the plants.
Timing of Fertilization
- Initial Growth: Apply fertilizer at planting time.
- Mid-Growth: Another application can be beneficial when the plants are about 4 inches tall.
7. Harvesting
Knowing when and how to harvest is critical for maximizing yield and taste.
When to Harvest
- Size: Turnips can be harvested when they reach 2-3 inches in diameter.
- Timing: Generally, turnips can be ready in 30-60 days from sowing, depending on the variety.
How to Harvest
- Tool Choice: Use a garden fork or spade to gently lift them from the soil, avoiding damage to the roots.
- Harvesting Greens: You can also harvest greens as the plants grow, promoting continued leaf production.
8. Aftercare
Post-harvest care is important for future plantings.
Soil Improvement
After harvesting, consider planting a cover crop, which can help maintain soil health through the off-season.
Cleaning
Remove any remaining debris and weeds from the garden bed to prevent pests and diseases in subsequent plantings.
9. FAQs About Growing Turnips
Q1: Can turnips be grown in containers?
A: Yes, turnips can be grown in containers as long as the container is deep enough to accommodate their roots, usually at least 12 inches.
Q2: What is the best way to store harvested turnips?
A: Store turnips in a cool, dark place, ideally in a refrigerator’s vegetable drawer. They can last several weeks when kept in a sealed bag.
Q3: Can turnips be grown year-round?
A: In mild climates, turnips can be grown year-round. In colder regions, they are typically grown in the spring and fall.
Q4: Are turnip greens edible?
A: Yes, turnip greens are nutritious and can be cooked or used in salads. Harvesting the greens can promote further root growth.
Q5: How can I improve the flavor of turnips?
A: Turnips grown in cooler temperatures tend to be sweeter. Ensure they receive consistent moisture and avoid growing them in hot weather to maintain their flavor.
Q6: What is the ideal temperature for growing turnips?
A: Turnips prefer temperatures between 50°F and 75°F (10°C – 24°C). Exposure to heat can cause them to become woody and bitter.
Conclusion
By understanding the needs of turnips and following these guidelines, you can easily achieve a quick and bountiful harvest. From soil preparation to harvesting, each step is vital to ensure success in growing this delightful root vegetable. Whether you are a beginner or an experienced gardener, implementing these strategies will surely lead to a fruitful turnip harvest. Happy gardening!