
Growing ginger at home is one of the most rewarding and surprisingly simple gardening experiences you can enjoy. Whether you live in a house with a spacious backyard or a small apartment with containers, ginger adapts beautifully. This aromatic root, prized for its medicinal value, culinary uses, and rich flavor, thrives exceptionally well in pots—making it the perfect plant for your home garden.
In this comprehensive guide, you’ll learn how to grow ginger easily, even if you’re a beginner. From selecting the right rhizomes to caring for the plant through harvest, every step is explained clearly so you can enjoy fresh, organic ginger straight from your home.
🌿 Why Growing Ginger at Home Is a Smart Choice
Ginger is a tropical plant that prefers warm, humid environments—conditions that are easy to recreate even indoors. Growing your own ginger ensures:
✔ Healthier, chemical-free produce
Store-bought ginger is often treated with chemicals to prevent sprouting. Home-grown ginger is natural and safe.
✔ Low maintenance
Once planted, ginger requires minimal attention—no complicated care routines needed.
✔ Continuous harvest
With the right method, you can harvest ginger throughout the year.
✔ Suitable for any climate
Even in cooler regions, ginger can thrive indoors or in greenhouses.
✔ Cost-effective
A single rhizome can grow into a large clump, giving multiple harvests.
🌱 Understanding How Ginger Grows
Before planting, it helps to know how ginger develops:
Rhizomes, Not Roots
Ginger grows from underground stems called rhizomes, not roots. These rhizomes store energy and give rise to shoots and leaves.
Slow but steady growth
Ginger takes 8–10 months to mature fully, but you can begin harvesting baby ginger in as little as 3–4 months.
Shade-loving
Unlike many plants, ginger prefers indirect sunlight, making it ideal for shaded garden corners or balconies.
🍂 Choosing the Right Ginger for Planting
The success of your ginger plant starts with choosing the right planting material.
Where to Get Ginger
You can buy:
- Fresh ginger from the vegetable market
- Organic ginger from grocery shops
- Seed ginger from nurseries
Important: Avoid ginger treated with growth inhibitors. Organic ginger is the safest choice.
How to Select Good Rhizomes
Pick pieces that:
- Are firm and plump
- Have visible “eyes” or buds
- Have at least 2–3 growing points
- Are free from mold or soft spots
For better growth, choose thick, healthy pieces with multiple nodes.
✂️ Preparing Ginger for Planting

Before planting ginger, prepare the rhizomes properly.
1. Cut into sections
If the rhizome is large, cut it into chunks, each with at least one eye.
2. Allow to dry
Let the cut sections dry for 24 hours.
This helps prevent rotting after planting.
3. Optional: Pre-sprouting
To speed up growth, you can soak the rhizome in water for 2–3 hours and place it in a warm area until buds start appearing.
🪴 Best Containers and Soil for Growing Ginger
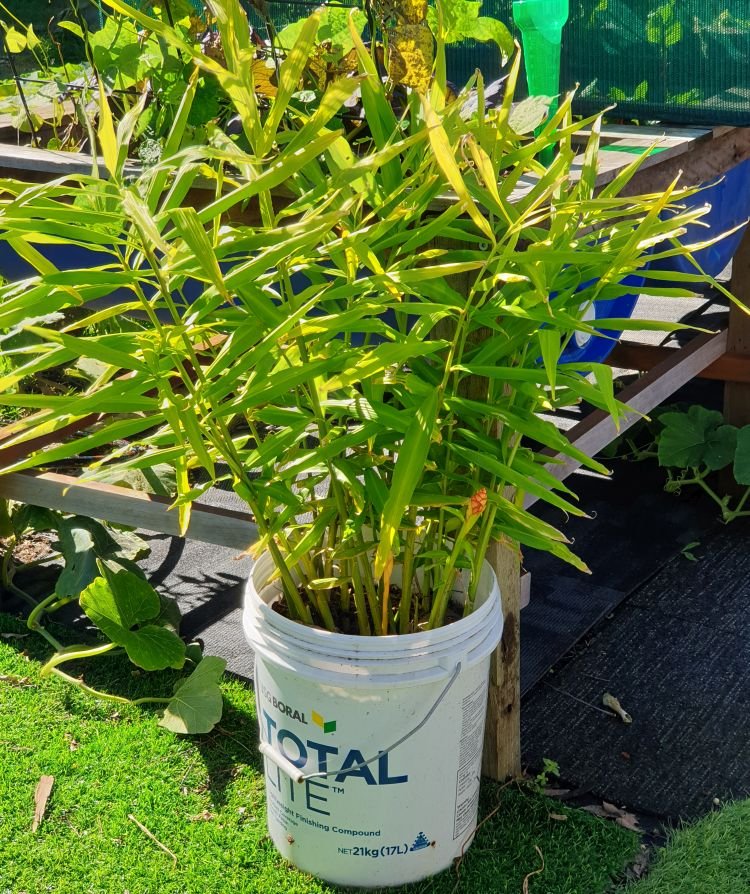
Choosing the Right Container
Ginger grows horizontally, not downward, so choose a wide container.
✔ Ideal size: 30–40 cm wide and 20–30 cm deep
✔ Ensure drainage holes
✔ Plastic, ceramic, or grow bags all work well
Best Soil Mix
Ginger loves loose, fertile soil.
Mix:
- 40% garden soil
- 40% compost
- 20% sand or cocopeat
The soil should be:
- Well-drained
- Rich in organic matter
- Slightly acidic to neutral (pH 5.5–7)
Avoid clay soil, which can cause rhizome rot.
🌾 How to Plant Ginger at Home
Follow these simple steps to plant ginger for maximum growth.
1. Fill the container
Fill ¾ of your pot with the prepared soil mix.
2. Place the rhizomes
Lay the ginger pieces horizontally with the buds facing upward.
3. Cover lightly
Add 2–3 cm of soil on top—don’t bury too deeply.
4. Water gently
Moisten the soil without flooding it.
5. Keep in a warm, shaded area
Place the pot where there is indirect sunlight and warmth.
Within 10–20 days, you’ll see green shoots emerging.
🌤 Ideal Growing Conditions for Ginger
Light
Ginger prefers partial shade.
Direct sunlight may scorch young leaves.
Temperature
Grows best between 22°C and 30°C.
Protect from frost or cold winds.
Humidity
Moderate humidity helps healthy growth.
💧 Watering Tips for Ginger
Watering is a key part of ginger care.
✔ Keep soil consistently moist
Not too wet, not too dry.
✔ Reduce watering in winter
The plant enters a resting phase.
✔ Avoid waterlogging
Too much water = rhizome rot.
A good rule: Water when the top 2–3 cm of soil feels dry.
🧪 Feeding Your Ginger Plant
Ginger is a heavy feeder. Supply nutrients regularly.
Fertilizers to Use
- Compost
- Vermicompost
- Cow dung manure
- Liquid fertilizers like seaweed extract
How Often to Feed
Every 3–4 weeks during active growth.
Avoid chemical fertilizers—they may cause burning and poor flavor.
🌿 Mulching: A Secret to Bigger Rhizomes
Mulching keeps the soil cool, moist, and fertile.
Use:
- Dry leaves
- Grass clippings
- Straw
- Cocopeat
A thick layer of mulch promotes larger, juicier rhizomes.
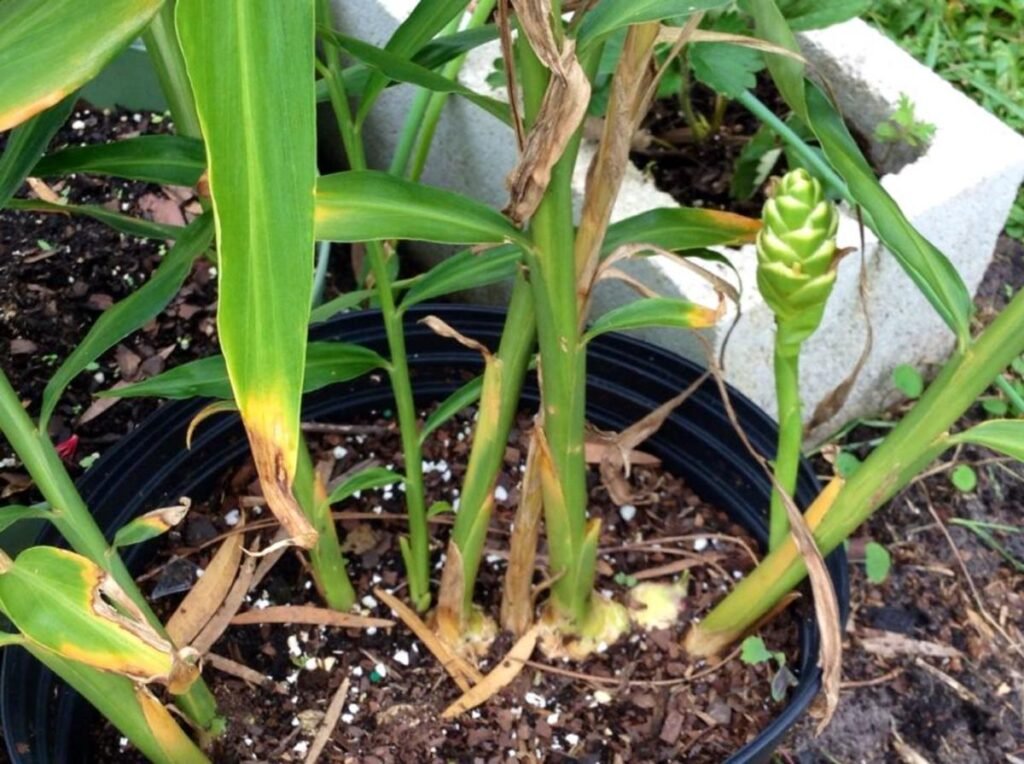
✂️ Pruning & Maintenance
While ginger requires minimal pruning, you can:
- Remove yellowing or damaged leaves
- Cut old stems at the soil line
- Trim to improve airflow
Healthy foliage means healthy rhizomes underground.
🐛 Protecting Ginger from Pests & Diseases
Common problems include:
1. Rhizome rot
Caused by overwatering or poor drainage
Solution: Improve soil and watering habits
2. Leaf spot disease
Brown spots on leaves
Solution: Neem oil spray + good airflow
3. Aphids or spider mites
Suck sap from leaves
Solution: Neem oil or soap water spray
Keep the plant clean and well-drained to avoid issues.
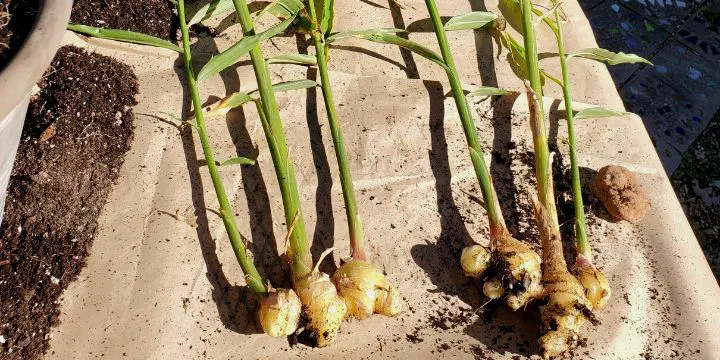
🍃 When and How to Harvest Ginger
Baby Ginger (Tender Ginger)
Harvest after 4–5 months
- Mild flavor
- Thin, easy-to-peel skin
- Perfect for cooking and tea
Mature Ginger
Harvest after 8–10 months when leaves turn yellow and dry.
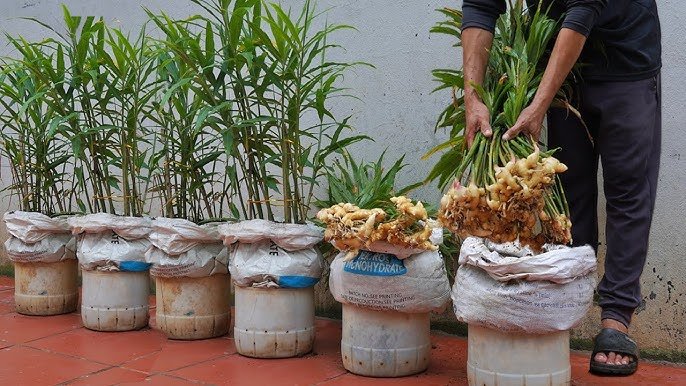
How to Harvest
- Gently loosen soil with your hands.
- Pull out the entire plant.
- Cut off the required amount of ginger.
- Replant a portion to continue growing.
This allows continuous production year-round.
🌱 Regrowing Ginger for Endless Supply
One of the best things about ginger is how easily it regrows.
Simply break off a piece with a bud and replant it.
This means you never need to buy ginger again—your home can produce it forever!
🌿 Growing Ginger Indoors
Don’t have a garden? No problem.
Ginger grows beautifully indoors if you provide:
- A warm location
- Bright indirect light
- Regular watering
- A wide pot
Keep the plant near a bright window but away from direct sun.
🌾 Benefits of Home-Grown Ginger
✔ 100% organic
✔ Richer flavor
✔ More medicinal value
✔ Zero chemicals or preservatives
✔ Always available when needed
✔ Cost savings
✔ Easier digestion and stronger aroma
You’ll never look at store-bought ginger the same way again!
🌟 Final Thoughts: Anyone Can Grow Ginger at Home
Growing ginger at home is one of the easiest gardening projects, perfect for beginners and experienced growers alike. As long as you give it warmth, moisture, and good soil, ginger thrives with very little effort. Whether in pots, grow bags, or your backyard, ginger rewards you with continuous harvests and incredible health benefits.
Imagine stepping into your garden or balcony and pulling out fresh, aromatic ginger whenever you need it—for tea, cooking, or herbal remedies. It’s satisfying, therapeutic, and incredibly practical.
If you want, I can also create: