Introduction
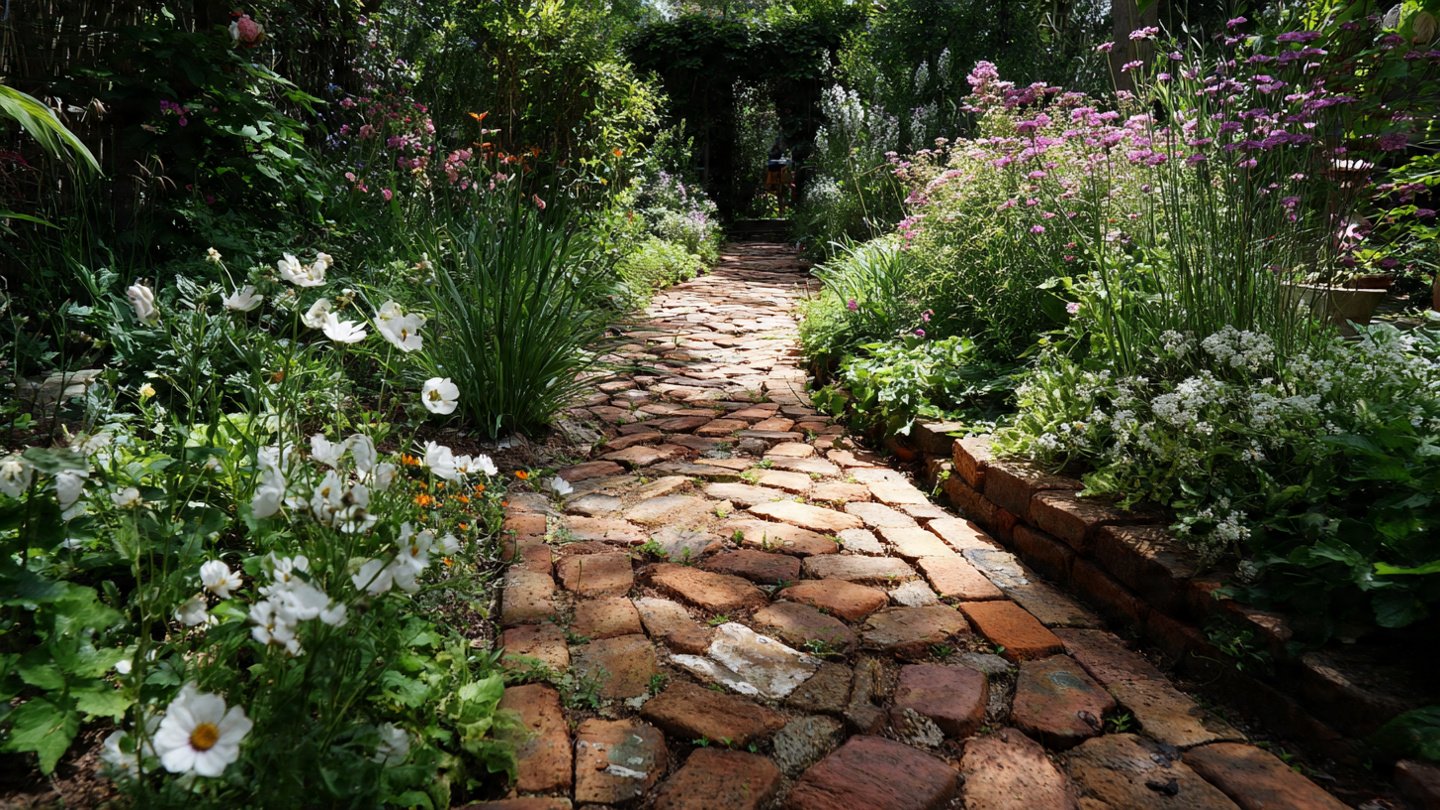
Old bricks lying around your yard or garage can be repurposed into a beautiful garden path. Not only will this project enhance the overall aesthetics of your outdoor space, but it will also provide a durable walkway that stands the test of time. This article will guide you through the process of transforming old bricks into a stunning garden path, covering everything from planning to execution.
Why Choose Old Bricks?
Old bricks add character and charm to any landscape. They are often available at a lower cost than new materials and can provide a rustic appeal that modern pavers simply cannot replicate. Furthermore, using reclaimed materials is an environmentally-friendly choice that minimizes waste.
Planning Your Garden Path
1. Assess Your Space
Before diving into the project, take a close look at your yard. Consider the following:
- Where do you want the path to go?
- What is the width of the path you’ll need?
- How many bricks do you have to work with?
2. Design Options
There are various designs you can consider for your path, including:
- Straight Path: A simple, linear design that is easy to lay out.
- Curved Path: A winding walkway that integrates naturally into the landscape.
- Patterned Path: Create intricate designs using different laying patterns like herringbone or basketweave.
3. Check Local Regulations
Before starting any outdoor project, check with your local authorities to see if there are any regulations regarding landscaping changes in your area.
Gathering Materials
In addition to your old bricks, gather the following materials:
- Sand or gravel for the base
- Landscape fabric (optional, but recommended)
- A shovel and rake
- A rubber mallet
- A level
- A broom
- A garden hose (for marking)
Preparing the Ground
1. Mark the Path
Using your garden hose, outline the shape of your path. This will help visualize the design and ensure accuracy when digging.
2. Clear the Area
Remove any grass, weeds, or debris from the marked path. Use a shovel to dig up soil to a depth of about 4-6 inches. This serves as the foundation for the bricks.
3. Level the Ground
Once the area is cleared, use a rake to level the soil. It’s essential for the path to have a stable, even base.
Laying the Bricks
1. Add Base Material
Pour about 2-3 inches of sand or gravel into the dug-out area. Use the rake to spread it evenly and ensure it’s compacted down well.
2. Install Landscape Fabric (Optional)
Lay down landscape fabric to prevent weeds from growing up between the bricks. This is particularly helpful in regions with heavy rainfall.
3. Start Laying Bricks
Begin placing your old bricks according to your chosen design. Start at one end and work your way to the other. Make sure to leave small gaps (about 1/4 inch) between the bricks for aesthetic appeal and drainage.
4. Level Each Brick
As you lay each brick, use a level to ensure they are even. Gently tap each brick into place with a rubber mallet to secure them into the sand or gravel base.
5. Fill Gaps
Once all the bricks are laid, sweep sand into the gaps between them. This will help stabilize the bricks and prevent them from shifting.
Finishing Touches
After the bricks are laid and secured, consider adding some finishing touches to enhance the path further:
- Bordering Plants: Plant low-growing flowers or ground cover along the edges for a more natural look.
- Lighting: Add solar lights along the path for evening illumination.
- Decorative Elements: Consider adding decorative stones or garden statues to personalize your path.
Conclusion
Transforming old bricks into a stunning garden path is a rewarding DIY project that adds both functionality and beauty to your outdoor space. By following the steps outlined in this guide, you can create a unique walkway that complements your garden’s design. Remember that using reclaimed bricks not only enhances your landscape but also supports sustainable practices.
FAQs
1. Can I use any type of old bricks for the path?
While most bricks are suitable, ensure they are in good condition without significant cracks or damage. Some bricks may be porous and not suitable for outdoor use, particularly in wet climates.
2. How long will the garden path last?
With proper installation and maintenance, an old brick path can last for decades, if not longer. Periodically checking for shifting bricks and filling gaps with sand can help prolong its life.
3. What if I don’t have enough old bricks?
If your supply is limited, consider mixing in new bricks or pavers for additional strength and stability. You could also use pebbles or gravel to fill in areas between bricks.
4. Is it difficult to maintain a brick path?
Maintaining a brick path is relatively simple. Regularly weed the gaps, sweep away debris, and refill sand as needed to keep it in good shape.
5. What tools do I need for this project?
The essential tools include a shovel, rake, level, rubber mallet, broom, and optionally, a landscape fabric cutter if you choose to use landscaping fabric.