Rosemary (Rosmarinus officinalis) is a beloved herb known for its aromatic leaves and culinary uses. Growing rosemary from cuttings is a popular method for gardeners and herb enthusiasts. However, achieving successful rooting can sometimes be challenging. This article explores quick techniques to enhance the success of rosemary cutting rooting while providing practical tips and an FAQ section to address common concerns.
Understanding Rosemary Cuttings
Rosemary is a woody perennial herb that thrives in well-draining soil and full sunlight. While rosemary can be grown from seeds, propagating through cuttings is often more efficient and quicker. Understanding the anatomy of a rosemary cutting is essential. A successful cutting should include:
- Stem Nodes: These are points on the stem where leaves emerge. Roots are more likely to develop when cuttings include nodes.
- Fresh Cut: A clean cut that promotes healthy growth and minimizes the risk of diseases.
Choosing the Right Time for Cuttings
Timing is crucial for propagating rosemary. The best time to take cuttings is during the growing season, typically in spring or early summer. During this period, the plant is vibrant, and the stems have the best potential for rooting.
Selecting Healthy Parent Plants
Before taking cuttings, ensure that the parent plant is healthy. Look for disease-free plants that are bushy and vibrant. This consideration will increase the chances of successful rooting.
Preparing the Cuttings
Step 1: Taking the Cuttings
Using clean, sharp scissors or pruning shears, follow these steps:
- Take 4 to 6-inch Cuttings: Choose stems that are firm yet flexible. Avoid overly woody or immature stems.
- Make a Clean Cut: Cut just below a node at a 45-degree angle. This angle increases the surface area for rooting and prevents the cutting from sitting flat in the soil.
Step 2: Remove Lower Leaves
After cutting, carefully remove the leaves from the lower half of the cutting. This step keeps the leaves from rotting and directs energy toward root development.
Step 3: Choose a Rooting Medium
The right medium is essential for rooting success. Consider these options:
- Perlite and Peat Mix: A combination of perlite and peat moss creates excellent drainage and aeration.
- Coconut Coir: This organic material retains moisture while preventing rot, making it an eco-friendly option.
Rooting Techniques
Technique 1: Water Propagation
- Place Cuttings in Water: Fill a glass or jar with water and place the cuttings inside, ensuring the lower nodes are submerged.
- Provide Indirect Light: Place the jar in a location with bright, indirect sunlight. Change the water regularly to keep it fresh.
- Wait for Roots to Form: In about 2-4 weeks, you should see roots developing.
Technique 2: Soil Propagation
- Prepare the Pot: Fill a small pot with your chosen rooting medium and moisten it slightly.
- Dipping in Rooting Hormone: While optional, applying rooting hormone to the cut end can encourage faster root growth. Dip the cut end in hormone before planting.
- Insert Cuttings: Make a hole in the rooting medium and gently place the cutting in, ensuring the nodes are buried. Firm the soil around the base.
- Watering: Water lightly to settle the soil, but avoid overwatering.
Technique 3: Humidity Dome Method
Creating a humid environment can expedite rooting. Here’s how:
- Cover the Cuttings: After inserting the cuttings in the soil, place a plastic bag or a clear plastic dome over the pot to retain moisture.
- Mist Regularly: Open the cover daily to mist the cuttings and prevent mold. This technique keeps humidity high, which is conducive to root development.
Technique 4: Bottom Heat
Using bottom heat can accelerate rooting. Here’s how to set it up:
- Heat Mat: Place the pot on a heat mat set to about 70-75°F (21-24°C). This gentle heat encourages root growth.
- Monitor Temperature: Ensure the cuttings are not overheating. Consistency is key in this method.
Maintenance Post-Rooting
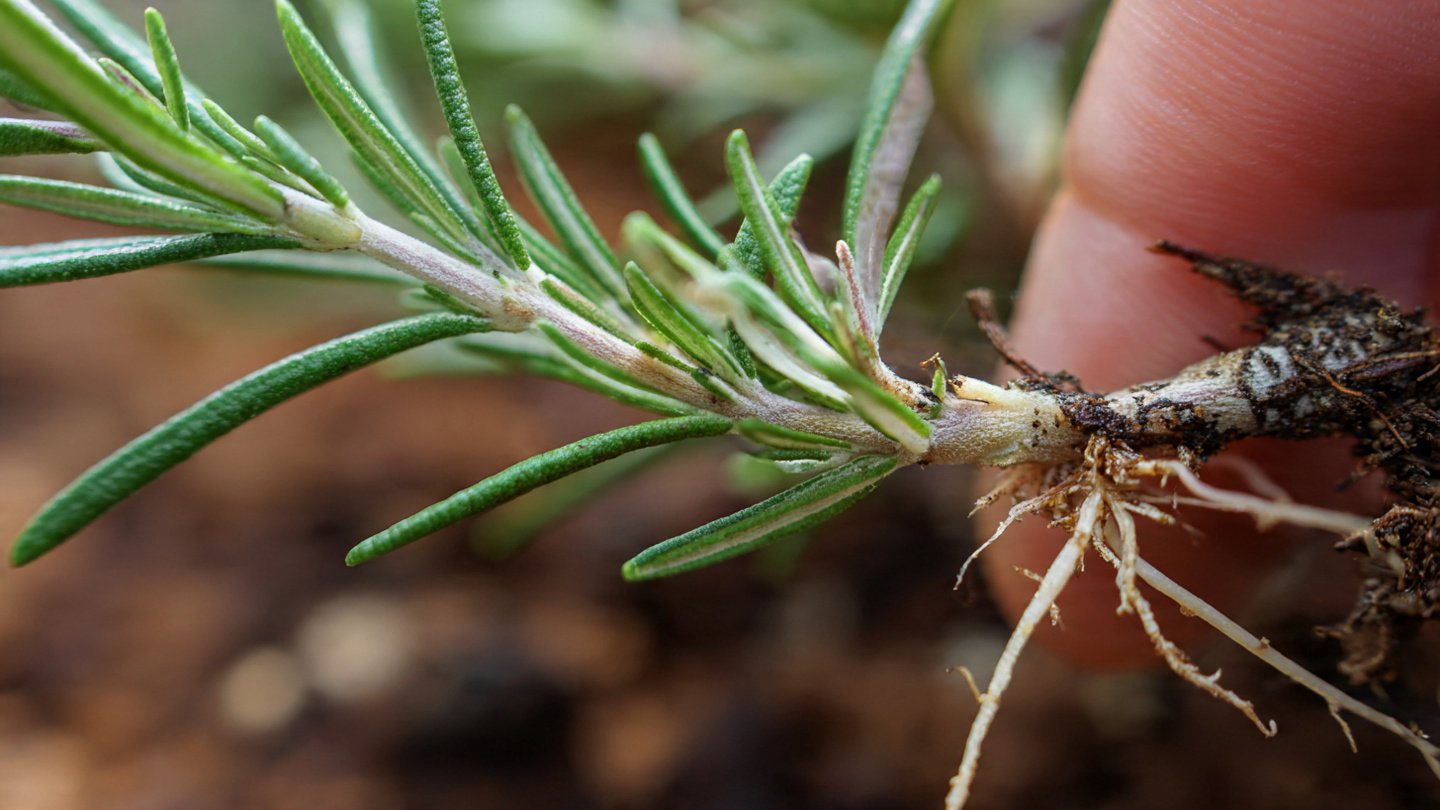
After a few weeks, monitor the cuttings for roots:
- Rooting Indicators: If you feel resistance when gently tugging on the cutting, roots are forming.
- Transplanting: Once the roots are about 2-3 inches long, transplant the cuttings into larger pots or directly into the garden.
Watering Considerations
Maintain consistent moisture levels as the new plants acclimate. However, avoid waterlogging, which can cause rot.
Fertilization Techniques
Once the cuttings have rooted, consider introducing a diluted, balanced fertilizer to encourage healthy growth. Use a half-strength solution every 4-6 weeks.
FAQs
1. What is the best time of year to take rosemary cuttings?
Spring and early summer are the best times, as the plant is actively growing.
2. Do I need rooting hormone for rosemary cuttings?
While not strictly necessary, using rooting hormone can significantly increase success rates, especially for those new to propagation.
3. How long does it take for rosemary cuttings to root?
Typically, rosemary cuttings take 2-4 weeks to root, depending on conditions and techniques used.
4. Can I propagate rosemary from store-bought cuttings?
Yes, as long as the cuttings are fresh and healthy. Look for cuttings that show no signs of wilting or disease.
5. How do I know if my cuttings have rooted?
Indicators include resistance when gently tugging on the cuttings and signs of new growth at the top.
6. What should I do if my cuttings start to rot?
Ensure that your cutting medium has adequate drainage and avoid over-watering. If rot occurs, cut back to healthy tissue and restart the propagation process if necessary.
7. Can I grow rosemary indoors?
Yes, rosemary can thrive indoors with sufficient light and care, ideally in a sunny windowsill.
8. How can I encourage bushier growth in my rosemary plant?
Pinch back the tips of the new growth after transplanting; this technique promotes branching and a fuller plant.
Conclusion
Successfully propagating rosemary cuttings can be a rewarding experience for gardeners and herb enthusiasts alike. By utilizing these techniques, you can enhance rooting success and enjoy the benefits of this fragrant herb in your garden or home. With patience and the right conditions, your rosemary cuttings can thrive, bringing greenery and flavor to your culinary adventures.