Paragraph 1: Introduction to Hibiscus Cutting Propagation
Hibiscus is one of the most popular flowering plants grown in home gardens due to its large, colorful, and attractive blooms. Propagating hibiscus through cuttings is a simple and cost-effective method that allows gardeners to create new plants identical to the parent plant. This method is preferred over seed propagation because it ensures faster growth and consistent flower quality. Hibiscus cutting propagation can be done easily at home with minimal tools and basic gardening knowledge. It is suitable for beginners as well as experienced gardeners. When done correctly, cuttings root quickly and grow into healthy, bushy plants. This technique is widely used in tropical and subtropical regions. Understanding the right steps ensures a high success rate.
Paragraph 2: Best Time for Hibiscus Cutting Propagation
Choosing the correct season is essential for successful hibiscus propagation through cuttings. The ideal time is during warm months, especially late spring to early summer, when the plant is actively growing. During this period, stems contain more nutrients and hormones that encourage root development. Avoid taking cuttings during winter because low temperatures slow down root formation. Early morning is the best time to collect cuttings as the plant tissues are well hydrated. Humidity and warmth play a crucial role in rooting success. In tropical climates, propagation can be done almost year-round with proper care. Seasonal timing significantly increases survival rates.
Paragraph 3: Selecting the Right Hibiscus Plant for Cuttings
Healthy parent plants produce healthy cuttings, making selection extremely important. Choose a hibiscus plant that is disease-free, pest-free, and actively growing. Avoid plants with yellow leaves, weak stems, or fungal infections. Semi-hardwood stems are ideal for cutting propagation because they balance flexibility and strength. The parent plant should have bloomed recently, indicating maturity and vigor. Strong plants pass their characteristics to the new plants. Selecting the right source ensures faster rooting and stronger growth. This step determines the overall success of propagation.
Paragraph 4: Tools and Materials Required
Preparing the right tools makes the propagation process smooth and hygienic. You will need a sharp pruning knife or garden scissors, clean pots, rooting hormone, potting mix, and water. Sterilizing tools prevents the spread of disease. Rooting hormone is optional but highly recommended to speed up root formation. Pots should have drainage holes to prevent waterlogging. A spray bottle helps maintain humidity. Transparent covers or plastic bags help create a greenhouse effect. Using proper materials increases rooting success and plant health.
Paragraph 5: How to Take Hibiscus Cuttings Properly
Cuttings should be taken from semi-hardwood stems that are neither too soft nor too woody. Each cutting should be about four to six inches long and contain at least two to three leaf nodes. Make the cut just below a node using a sharp blade to encourage root growth. Remove the lower leaves to reduce moisture loss. Keep only two or three leaves on the top. If leaves are large, trim them slightly to reduce transpiration. Proper cutting technique improves survival chances significantly.
Paragraph 6: Preparing the Cuttings for Planting
Once cuttings are collected, they should be prepared immediately. Dip the lower end of the cutting into rooting hormone powder or gel. This stimulates faster root development and protects against fungal infections. Shake off excess hormone gently. Allow the cut end to dry for a few minutes before planting. Ensure the cutting remains moist but not wet. Avoid letting the cuttings dry out completely. Preparation plays a critical role in rooting success.
Paragraph 7: Ideal Soil Mix for Hibiscus Cuttings
A light, well-draining soil mix is essential for hibiscus cuttings. The best mix includes garden soil, river sand, and compost in balanced proportion. Sand improves drainage while compost provides nutrients. Avoid heavy clay soil as it retains excess moisture and causes rot. The soil should be loose and airy. Sterilized soil reduces the risk of fungal infection. Proper soil texture encourages root growth and oxygen availability. Good soil preparation leads to strong root systems.
Paragraph 8: Planting the Hibiscus Cuttings
Make a small hole in the soil using a stick or finger. Insert the cutting carefully into the hole, ensuring at least one node is buried. Press the soil gently around the stem to hold it upright. Water lightly to settle the soil without disturbing the cutting. Avoid deep planting as it may cause rot. Place the pot in a warm, shaded location. Proper planting depth and positioning are crucial for successful rooting.
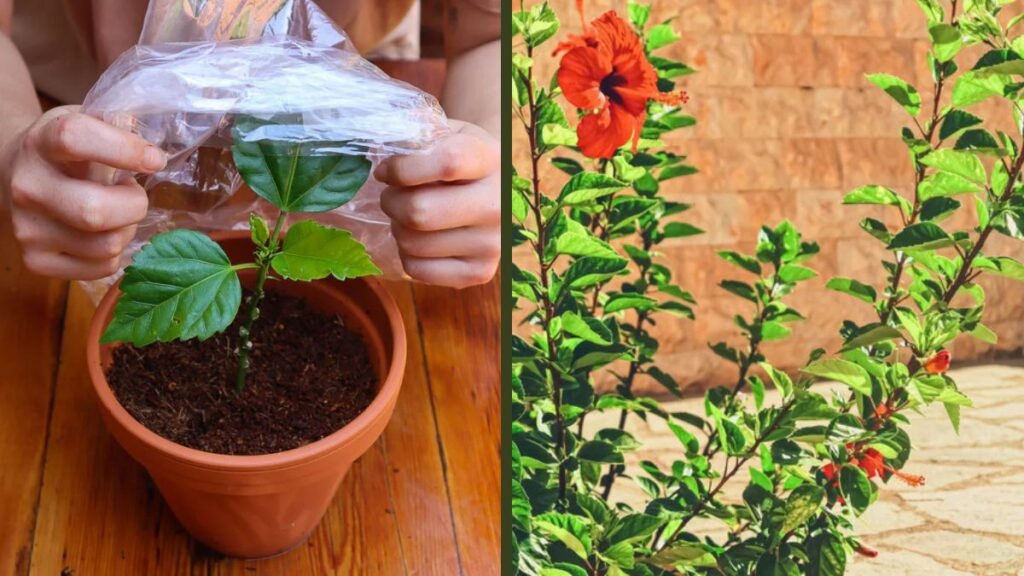
Paragraph 9: Watering and Humidity Requirements
Hibiscus cuttings require consistent moisture but not excess water. Overwatering leads to stem rot, while underwatering causes dehydration. Mist the cuttings regularly to maintain humidity. Covering the pot with a transparent plastic bag helps retain moisture. Ensure some airflow to prevent fungal growth. Water the soil only when the top layer feels slightly dry. Balanced watering ensures steady root development. Humidity control is one of the most important factors.
Paragraph 10: Light and Temperature Conditions
Cuttings should be kept in bright, indirect sunlight. Direct sun can dry out the cuttings quickly. Ideal temperatures range between twenty to thirty degrees Celsius. Warm conditions accelerate root formation. Avoid placing cuttings in windy or cold areas. Indoor propagation near a window works well. Stable temperature and light conditions improve success rates. Environmental stability supports healthy growth.
Paragraph 11: Root Development Timeline
Roots usually begin to form within three to four weeks. You may notice new leaf growth as a sign of successful rooting. Gently tug the cutting to check resistance, indicating root formation. Avoid disturbing the cutting frequently. Patience is key during this stage. Root development speed depends on temperature and humidity. Healthy cuttings root faster. Proper care shortens the rooting period.
Paragraph 12: Transplanting Rooted Hibiscus Cuttings
Once roots are well developed, the cutting can be transplanted into a larger pot or garden soil. Choose a location with good sunlight and drainage. Harden the plant gradually by exposing it to outdoor conditions. Transplant during the evening to reduce stress. Water immediately after transplanting. Avoid disturbing the roots excessively. Successful transplanting ensures continued growth.
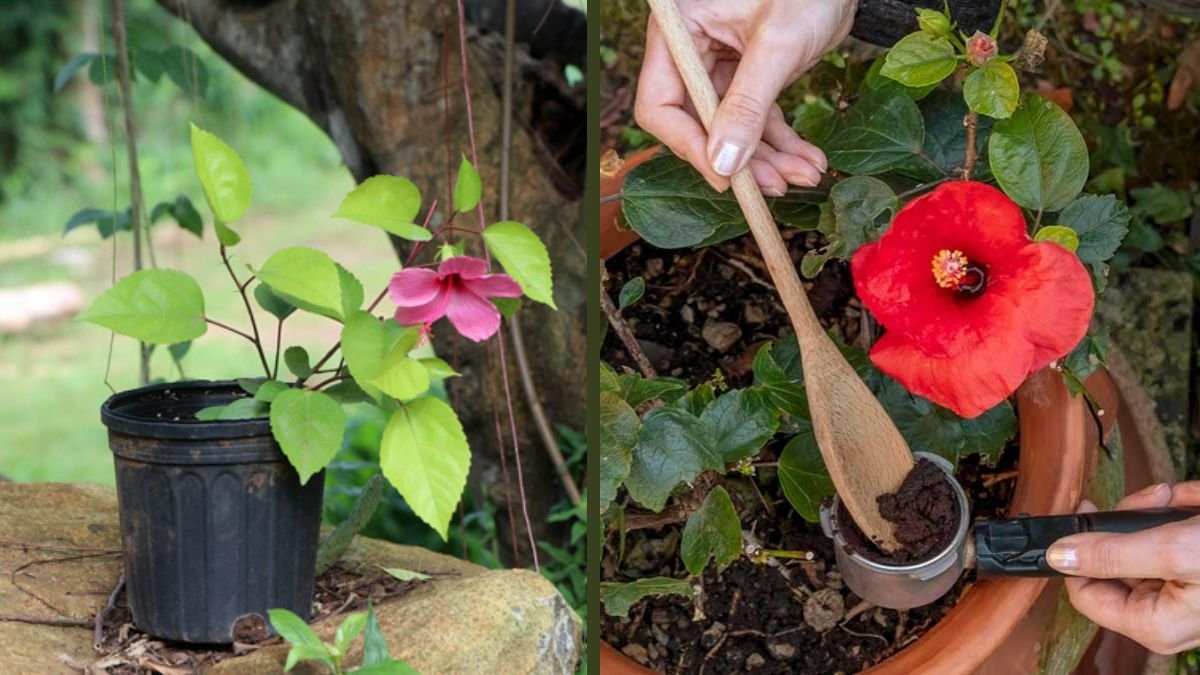
Paragraph 13: Fertilizing Young Hibiscus Plants
Young hibiscus plants benefit from light fertilization after establishment. Use organic compost or diluted liquid fertilizer. Avoid strong fertilizers initially as they may burn roots. Fertilize once every two weeks. Nutrients support leaf and stem development. Balanced nutrition promotes healthy flowering later. Fertilization should be moderate and regular.
Paragraph 14: Common Problems and Solutions
Common problems include wilting, leaf drop, and fungal infections. Overwatering is the main cause of failure. Ensure proper drainage and airflow. Use fungicide if needed. Yellow leaves indicate nutrient deficiency or stress. Adjust watering and light conditions accordingly. Monitoring plants regularly helps identify issues early. Timely action prevents plant loss.
Paragraph 15: Pest Control for Hibiscus Plants
Hibiscus plants may attract aphids, mealybugs, and spider mites. Inspect plants regularly for pests. Use neem oil spray or mild soap solution. Avoid chemical pesticides for young plants. Keeping plants clean reduces pest infestation. Healthy plants resist pests better. Integrated pest management ensures long-term health.
Paragraph 16: Benefits of Hibiscus Cutting Propagation
Cutting propagation preserves the exact characteristics of the parent plant. It is faster than seed propagation. It allows mass production of plants at low cost. Gardeners can propagate favorite varieties easily. Plants grow faster and bloom earlier. This method is ideal for home gardeners. It ensures consistency and reliability.
Paragraph 17: Hibiscus Cutting Propagation Table
Table: Key Factors for Successful Hibiscus Cutting Propagation
Factor | Recommended Practice
Season | Late spring to early summer
Cutting type | Semi-hardwood stem
Soil mix | Garden soil, sand, compost
Light | Bright indirect sunlight
Rooting time | Three to four weeks
Paragraph 18: Indoor vs Outdoor Propagation
Indoor propagation offers better control over temperature and humidity. Outdoor propagation works well in tropical climates. Indoor methods reduce pest risk. Outdoor methods require shading. Both methods are effective with proper care. Choose based on climate conditions. Flexibility makes this method suitable everywhere.
Paragraph 19: Long-Term Care of Hibiscus Plants
Regular pruning encourages bushy growth and more flowers. Water consistently but avoid waterlogging. Apply fertilizer during the growing season. Protect plants from extreme weather. Healthy maintenance ensures long flowering periods. Hibiscus thrives with proper care. Long-term attention yields beautiful blooms.
Paragraph 20: Conclusion
Hibiscus cutting propagation is a simple, reliable, and rewarding gardening technique. With basic tools and proper care, anyone can grow healthy hibiscus plants at home. This method saves time and money while producing identical plants. Understanding each step increases success rates. Hibiscus plants add beauty and color to gardens. Propagation through cuttings ensures continuous enjoyment. Start today and enjoy vibrant blooms.