Growing kale in containers is an excellent way to enjoy this nutrient-packed leafy green, especially for those with limited garden space or who want to optimize their gardening experience. Kale, often cited as a “superfood,” is rich in vitamins A, C, and K, as well as antioxidants and fiber. This guide will explore simple techniques to successfully grow kale in containers, allowing you to harvest fresh greens right from your home.
Benefits of Growing Kale in Containers
Space Efficient
Container gardening is ideal for urban dwellers or those with limited access to traditional garden plots. Kale can thrive in smaller spaces, making it perfect for patios, balconies, or even small yards.
Control Over Conditions
Growing kale in containers offers better control over the environment. You can adjust sunlight exposure, soil composition, and moisture levels more easily than in inground gardening. Container gardening also minimizes common soil-borne pests and diseases.
Accessibility
Maintaining plants at a comfortable height is easier in containers, especially for individuals with physical limitations. This accessibility increases the enjoyment and ease of gardening.
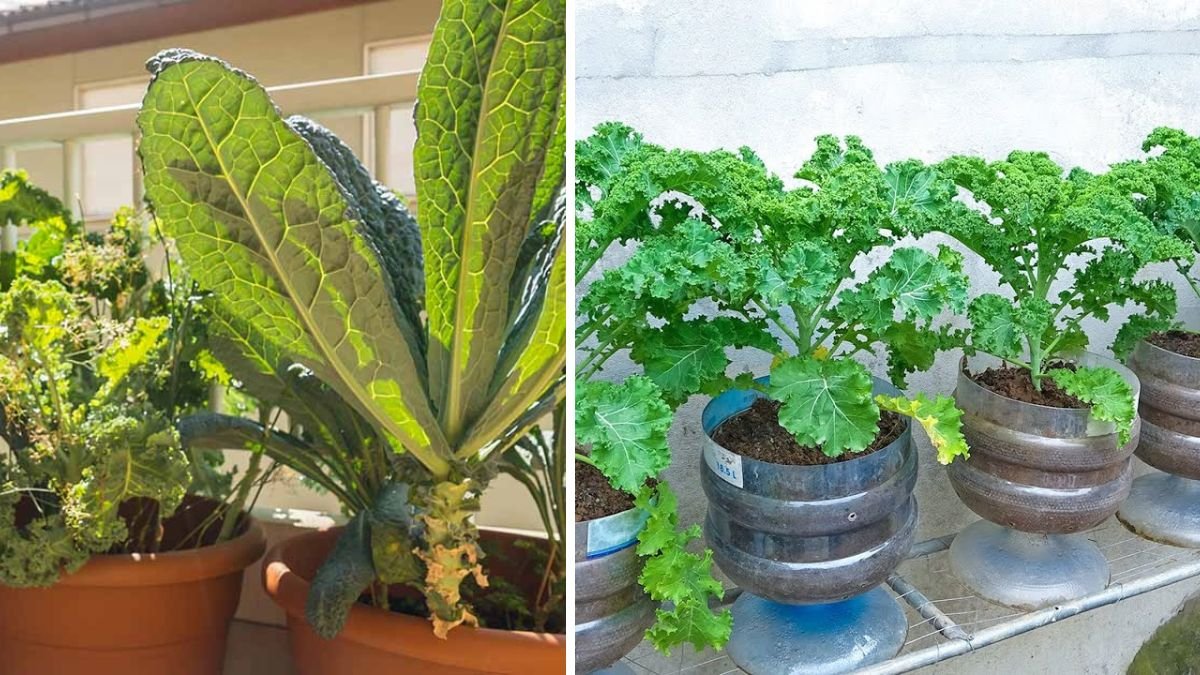
Choosing the Right Containers
Size Matters
When selecting a container for kale, size is crucial. A minimum of 12 inches in diameter and 12 inches deep is ideal. This space ensures adequate root development, which is essential for nutrient uptake and plant health.
Material Considerations
While many materials can be used, some considerations include:
- Plastic: Lightweight and retains moisture well, but can heat up quickly in the sun.
- Terracotta: Attractive but tends to dry out faster than other materials. It is breathable, which can be advantageous for root health.
- Wood: Natural and aesthetically pleasing but needs treatment to prevent rot.
Drainage
Ensure that your container has sufficient drainage holes. Kale roots can rot in overly moist conditions, so excellent drainage is necessary. If the container doesn’t have holes, create them or choose another vessel.
Selecting the Right Soil
Quality Potting Mix
Utilizing a high-quality potting mix is essential when growing kale in containers. Look for a mix that is lightweight, drains well, and is rich in organic matter. These mixes usually contain a combination of peat moss, vermiculite, and compost, providing essential nutrients.
Nutrient-Rich Additives
Consider adding an organic fertilizer or compost to the mix. Kale thrives in nutrient-rich soil. A balanced fertilizer will provide the necessary nutrients for robust growth.
Soil pH
Kale prefers a slightly acidic to neutral soil pH, typically between 6.0 and 7.5. Conducting a soil test can help you determine the pH and guide any necessary adjustments with lime or sulfur.
Sunlight Requirements
Ideal Conditions
Kale thrives in cooler weather and flourishes best in full sun to partial shade. Aim for at least six hours of sunlight daily. While it can tolerate some shade, especially in warmer climates, insufficient sunlight will result in slower growth and less nutrient density.
Positioning Your Containers
When positioning your containers, observe how sunlight moves across your space. This will help you select the best spots for your kale pots. If possible, adjust pots based on seasonal changes in sunlight exposure.
Planting Kale: Sowing Seeds vs. Transplants
Sowing Seeds Directly
If you choose to plant kale from seed, sow directly in the container. Here’s a step-by-step guide:
- Prepare the Soil: Fill the container with the potting mix, leaving about an inch of space at the top.
- Sow Seeds: Plant approximately 3-4 seeds per container, about half an inch deep.
- Water Gently: Water lightly after planting to avoid displacing the seeds.
Starting with Transplants
If you prefer a jumpstart, consider using transplants. This method ensures quicker growth and can lead to earlier harvests:
- Purchase Healthy Plants: Choose young, robust kale plants from a reputable nursery.
- Transplanting: Make a hole in the center of the container and gently place the transplant, covering the roots with soil.
Watering Techniques
Consistent Moisture
Kale needs consistent moisture, particularly in containers where soil can dry out quickly. Aim for evenly moist soil without becoming waterlogged.
Watering Tips
- Check Soil Moisture: Insert your finger about an inch deep into the soil. If it’s dry, it’s time to water.
- Use a Soaker Hose or Watering Can: Water at the base of the plant to avoid wetting the leaves, which can lead to fungal diseases.
Signs of Under- or Over-Watering
- Under-watered Kale: Leaves may become wilted or yellow.
- Over-watered Kale: Leaves can turn yellow and mushy, signaling root rot.
Fertilizing Your Kale
Nutrient Boosts
Kale benefits from regular fertilization when grown in containers. Consider using organic options like fish emulsion or a balanced all-purpose fertilizer.
Recommended Schedule
- Initial Fertilization: Apply fertilizer at planting.
- Ongoing Fertilization: Fertilize every 4-6 weeks during the growing season.
Signs of Nutrient Deficiency
- Nitrogen Deficiency: Yellowing leaves indicate a lack of nitrogen.
- Magnesium Deficiency: Leaves will show yellowing between the veins, leading to a mottled appearance.
Pests and Diseases
Common Pests
- Aphids: Small, soft-bodied insects that can be easily controlled with insecticidal soap.
- Cabbage Worms: These can be managed by handpicking or through use of organic pesticides.
Preventive Measures
Strong, healthy plants are less susceptible to pests and diseases. Regularly inspect your kale for signs of trouble, and consider using companion planting techniques to deter pests. Marigolds, for example, can repel pests when planted nearby.
Harvesting Kale
When to Harvest
Kale leaves can be harvested once they are 4-6 inches long. Younger leaves are typically more tender and flavorful. You can start harvesting as soon as the leaves are big enough to eat, allowing for multiple cuttings throughout the growing season.
Techniques for Harvesting
- Cutting Leaves: Use clean, sharp scissors or shears to cut the leaves, taking outer leaves first.
- Leave the Center Intact: Avoid cutting the central growing point; this will allow the plant to produce more leaves.
Maintaining Your Kale Throughout the Season
Regular Monitoring
Keep an eye on moisture levels, check for pests, and ensure your kale is receiving enough sunlight.
Seasonal Care Adjustments
As the weather changes, you may need to adjust your care routine. In hot summers, consider moving containers to provide partial shade, while in cooler weather, ensure they are still receiving sufficient sunlight.
FAQs
1. Can you grow kale indoors?
Yes! Kale can be successfully grown indoors. Ensure it receives enough sunlight (about 6 hours a day), or supplement with grow lights.
2. How often should I water my container-grown kale?
Monitor the soil moisture and water when the top inch of soil is dry. This typically means watering every 2-3 days, depending on the heat.
3. What temperature is optimal for growing kale?
Kale thrives in cooler temperatures, ideally between 50°F and 70°F. It can withstand light frosts, enhancing its sweetness.
4. Is it necessary to thin my kale plants?
Yes, if growing from seed, thinning is essential. Once seedlings are about 2-3 inches tall, trim them down to the strongest ones, allowing adequate space for growth.
5. Can kale be grown year-round in containers?
With the right techniques, such as selecting cold-hardy varieties and providing winter protection, kale can be grown year-round in containers in many regions.
6. How long does it take from planting to harvest?
Kale usually takes about 55-75 days from seed to harvest, depending on the variety and growing conditions.
7. What should I do if my kale leaves turn yellow?
Yellowing leaves can indicate over-watering or nutrient deficiencies; check your soil moisture and consider fertilizing if needed.
Conclusion
Growing kale in containers is an accessible and rewarding way to enjoy this vibrant, nutrient-rich leafy green. With the right techniques, such as selecting appropriate containers, quality soil, and proper care, anyone can cultivate kale at home. Whether you’re an experienced gardener or just starting, these simple techniques can help you reap a bountiful harvest of healthy greens year-round. Enjoy the process and the delicious rewards of your container garden!